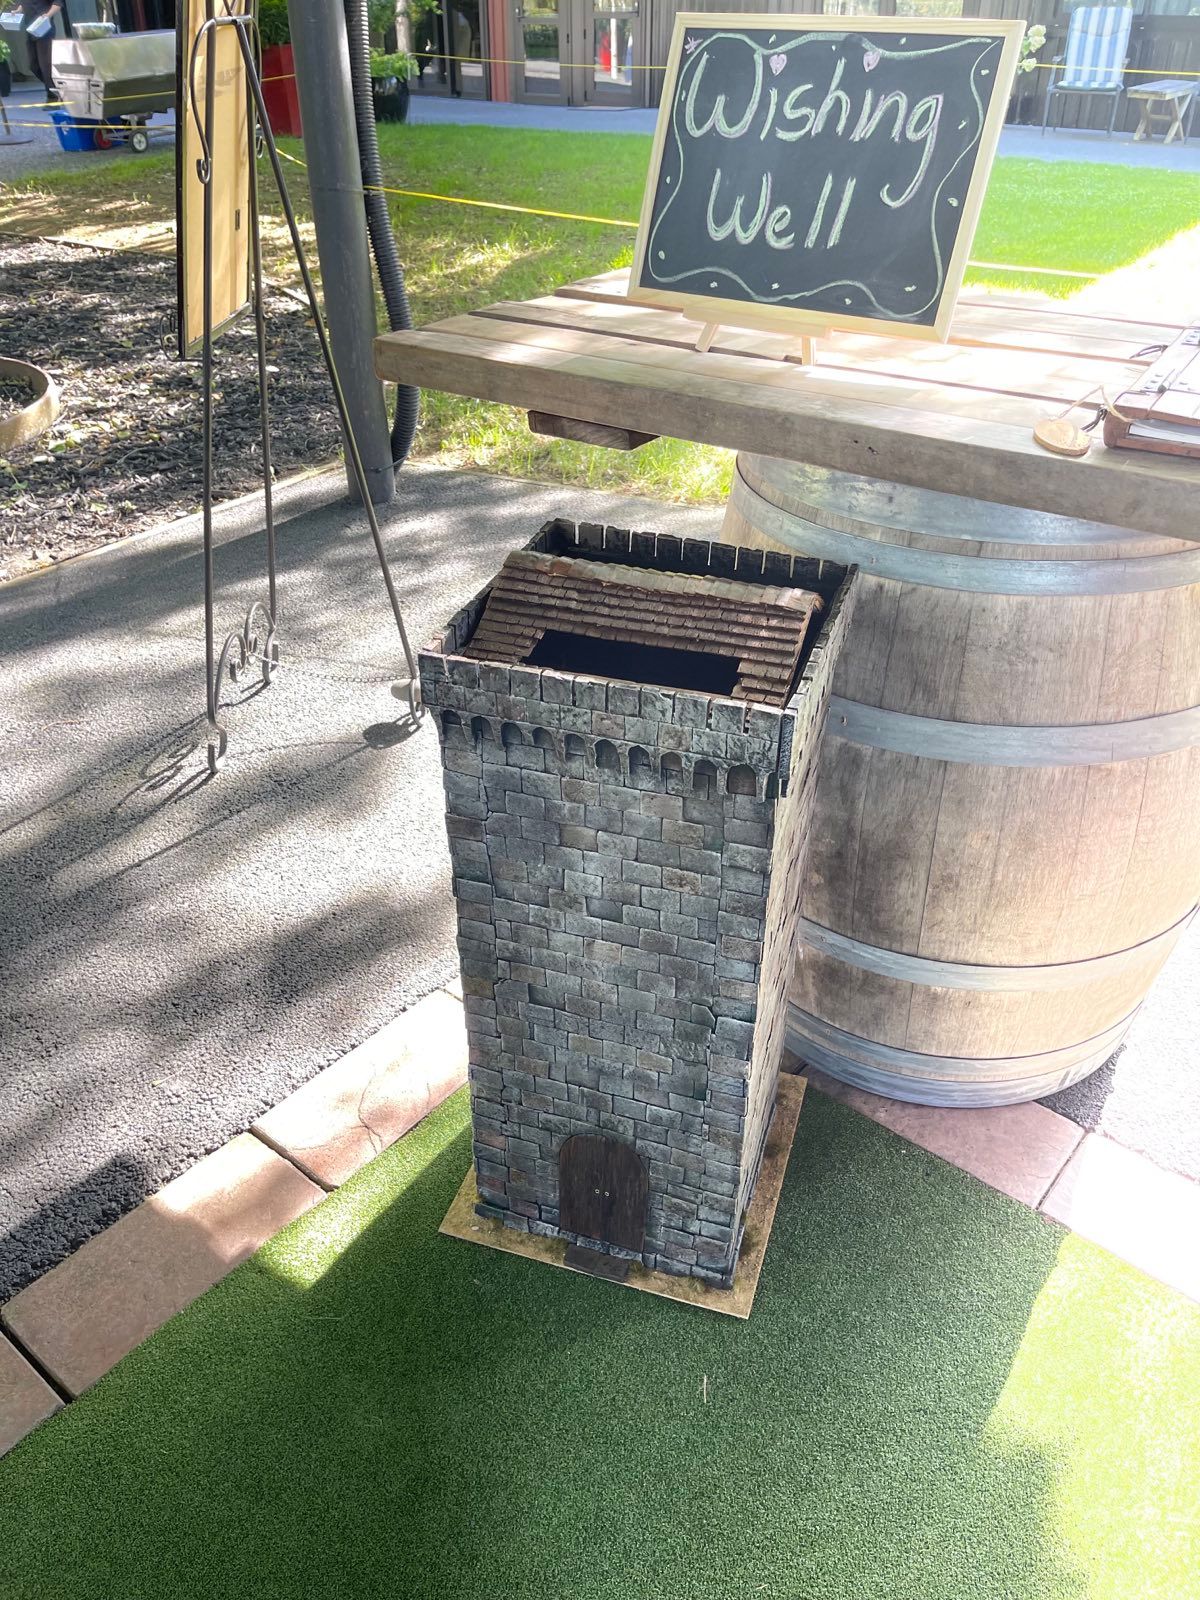
Gift Tower

Two friends got married at the weekend, we met through D&D and they wanted a wishing well for people to put their cards in but they wanted something that fitted them and their love of the game.
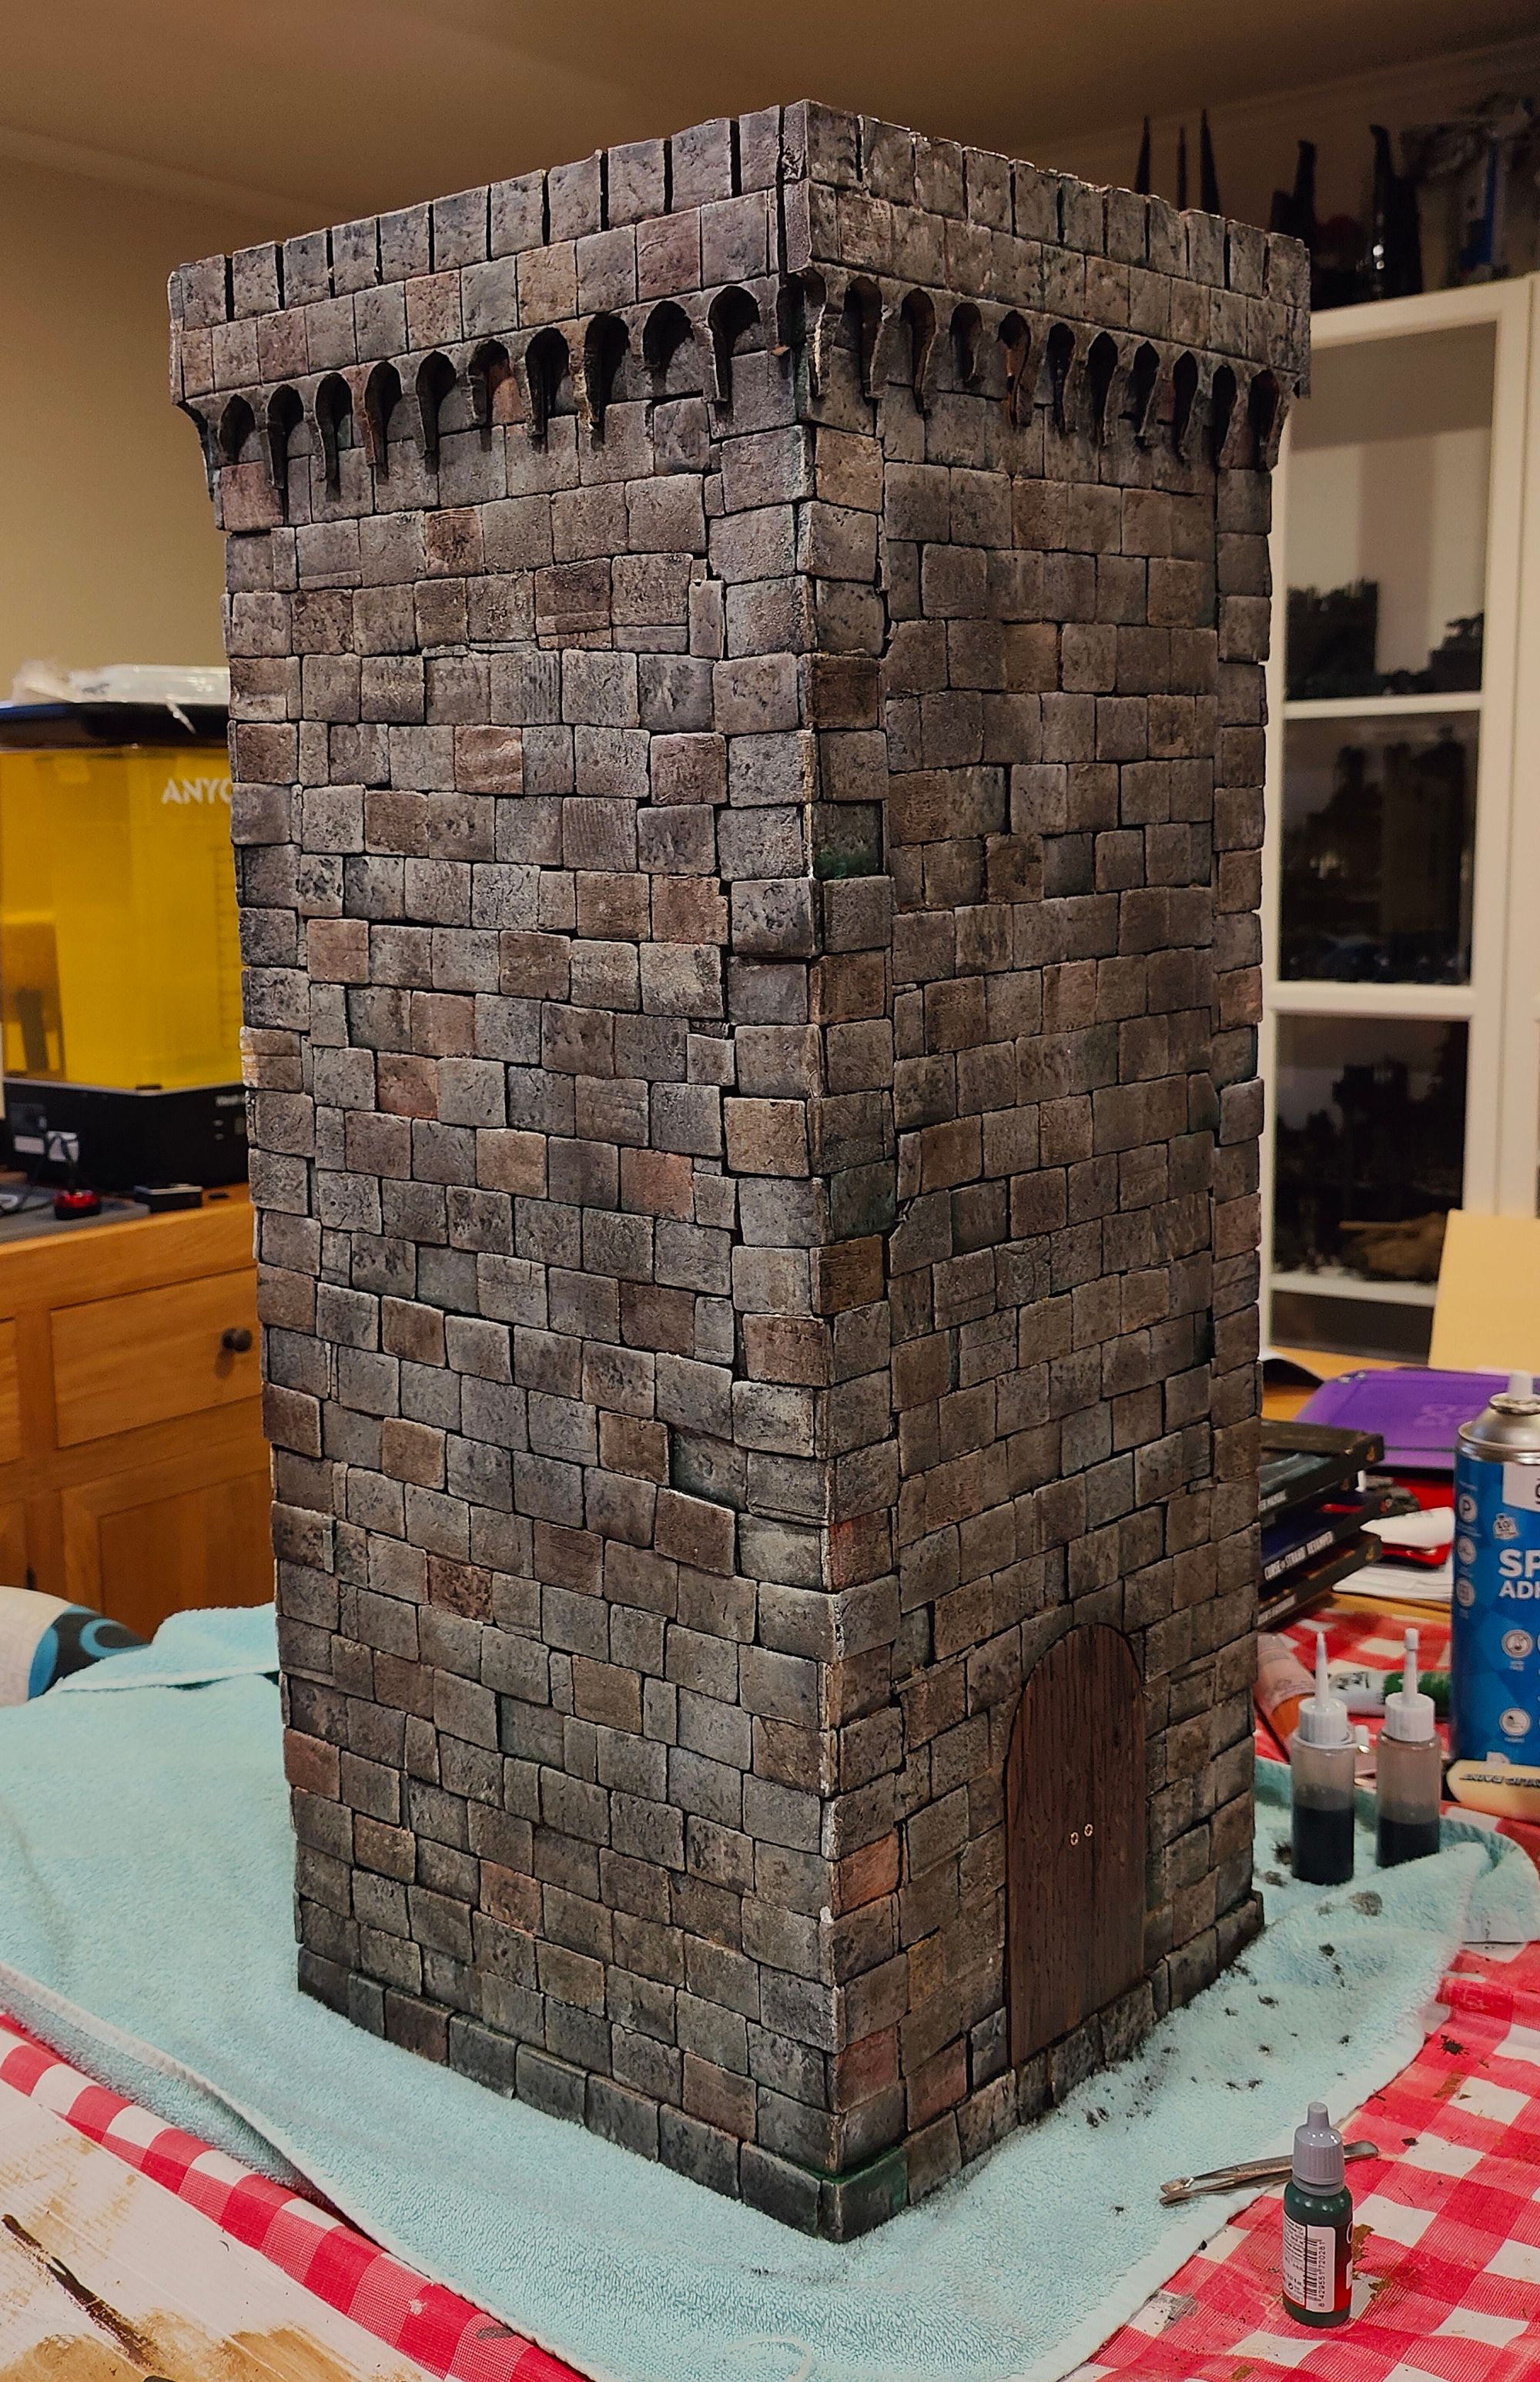
After procrastinating for many months I finally started the week of the wedding (thank you ADHD) and with 4 evenings after work got to constructing a simple castle tower. I took as many short cuts as possible and took a look at Lochie from ZorpaZorp’s video ‘Ultimate Stone Painting Guide’ and the happy couple chose Dungeon Grime as their paint scheme of choice. All of this is perfect as any decision takes me so long to make that I work quickest when, in effect, making a commission piece. It mostly went ok and I think would have been better if I had started earlier but then I knew that during the “Time of Procrastination”.
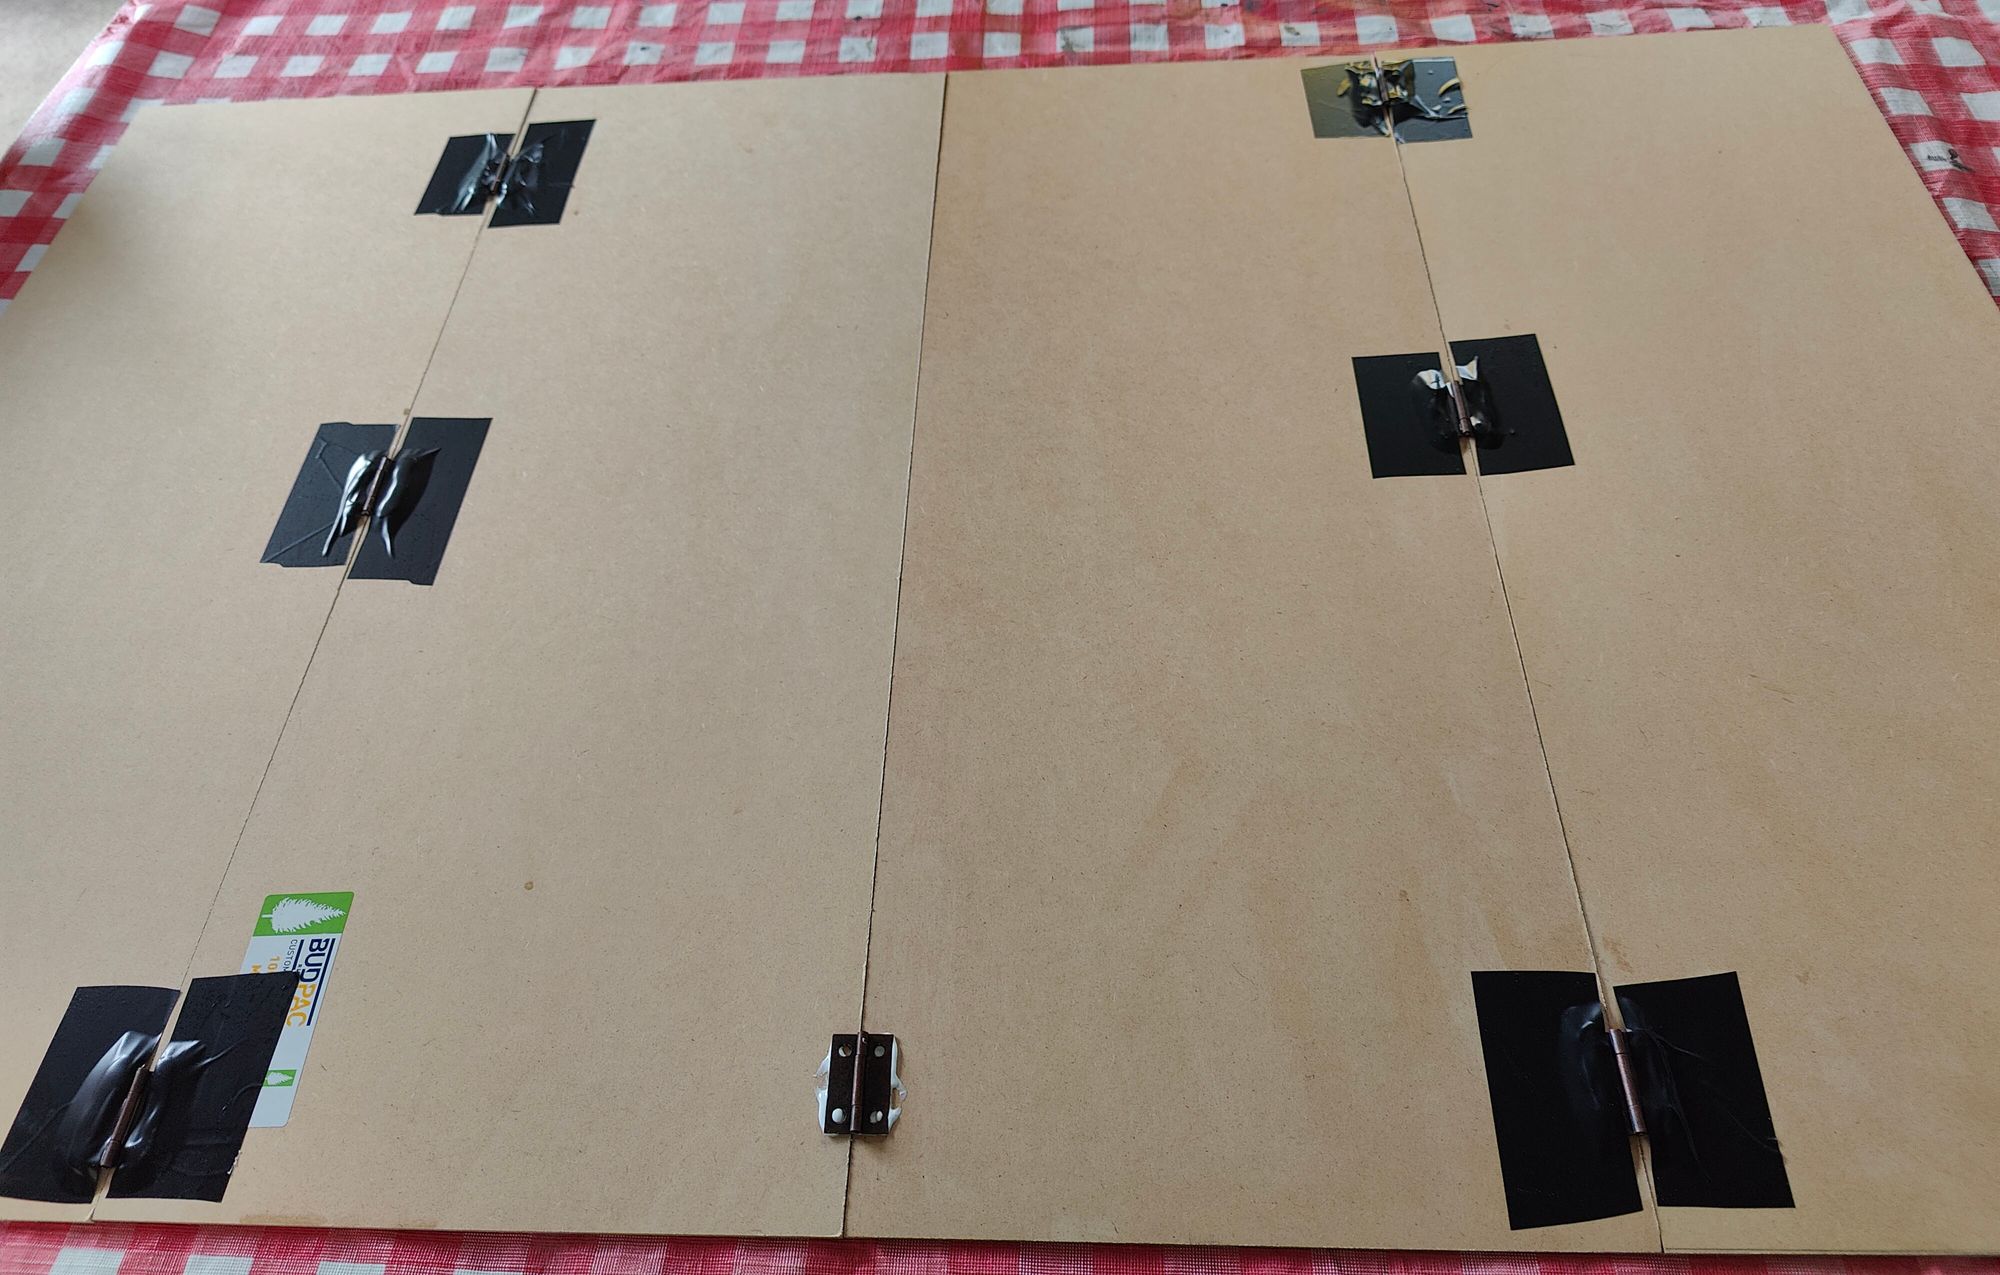
I started by cutting MDF walls and creating the base structure. This model was a lot bigger than I was used to creating so I decided to join the walls with tiny hinges that were glued on with wood glue, a layer of hot glue and topped with a layer of Gorilla tape for support. Angle guides were used to get the 90 degree angles at the corner, but with a four sided tower I doubt this was really necessary.
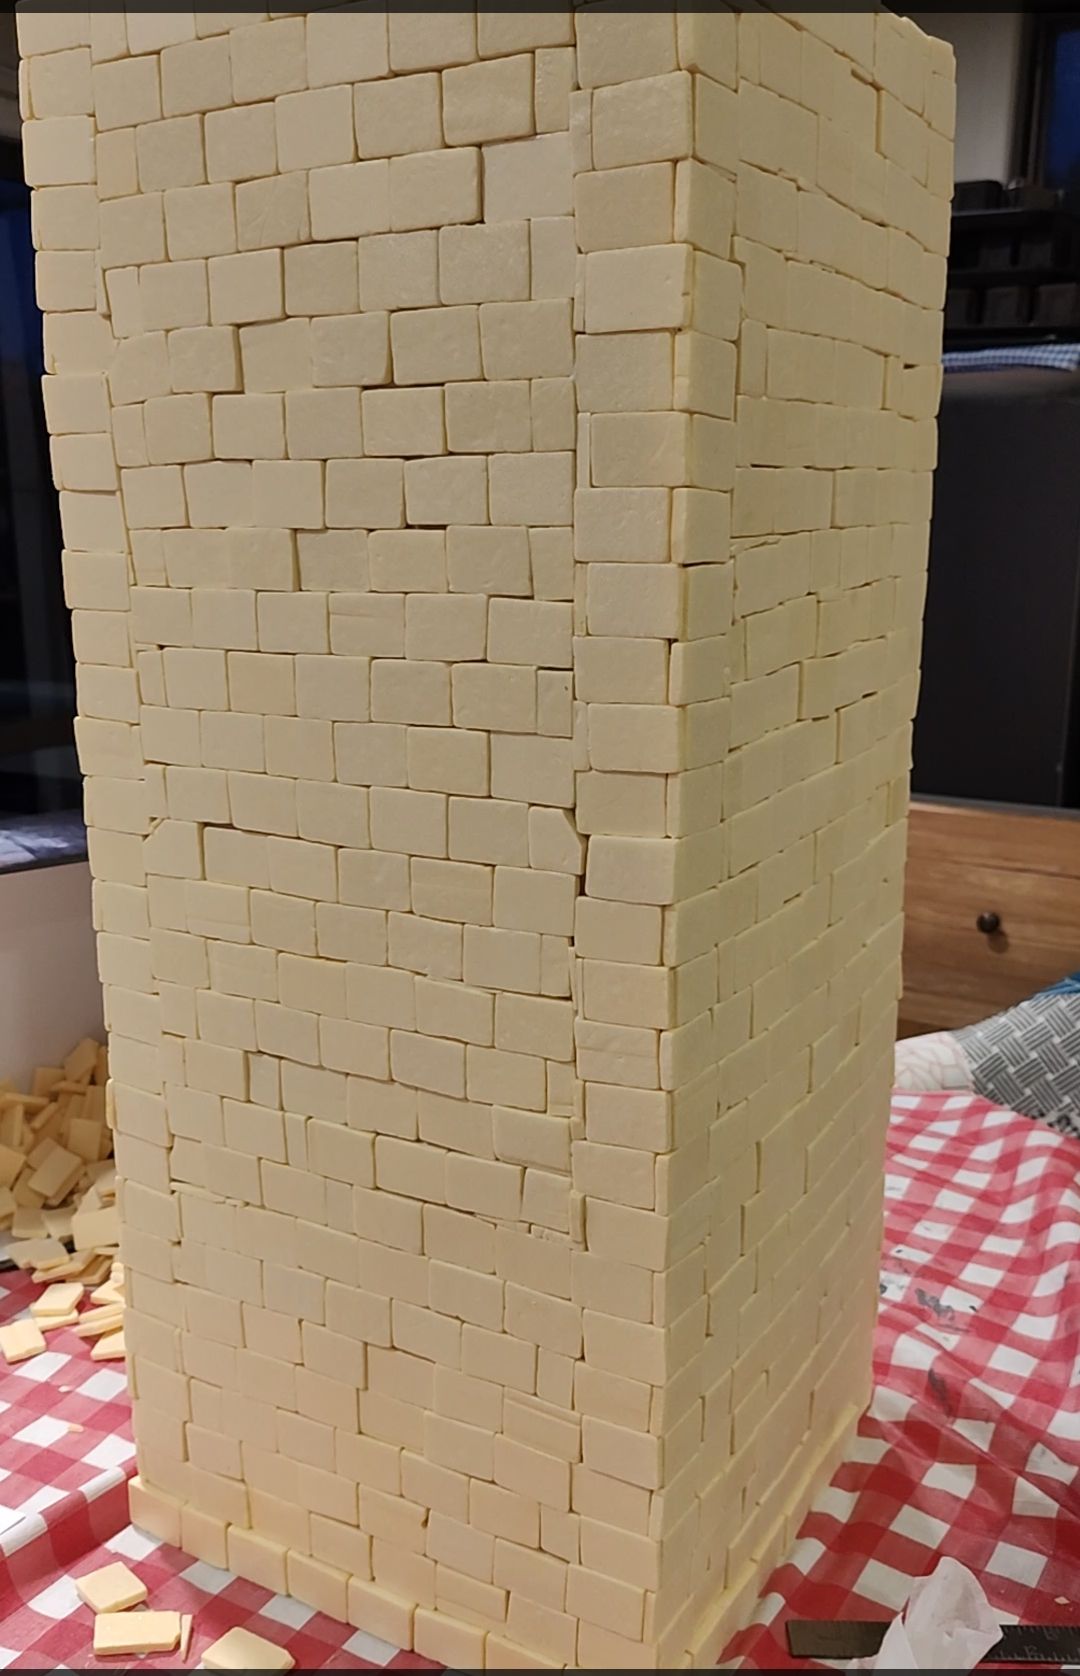
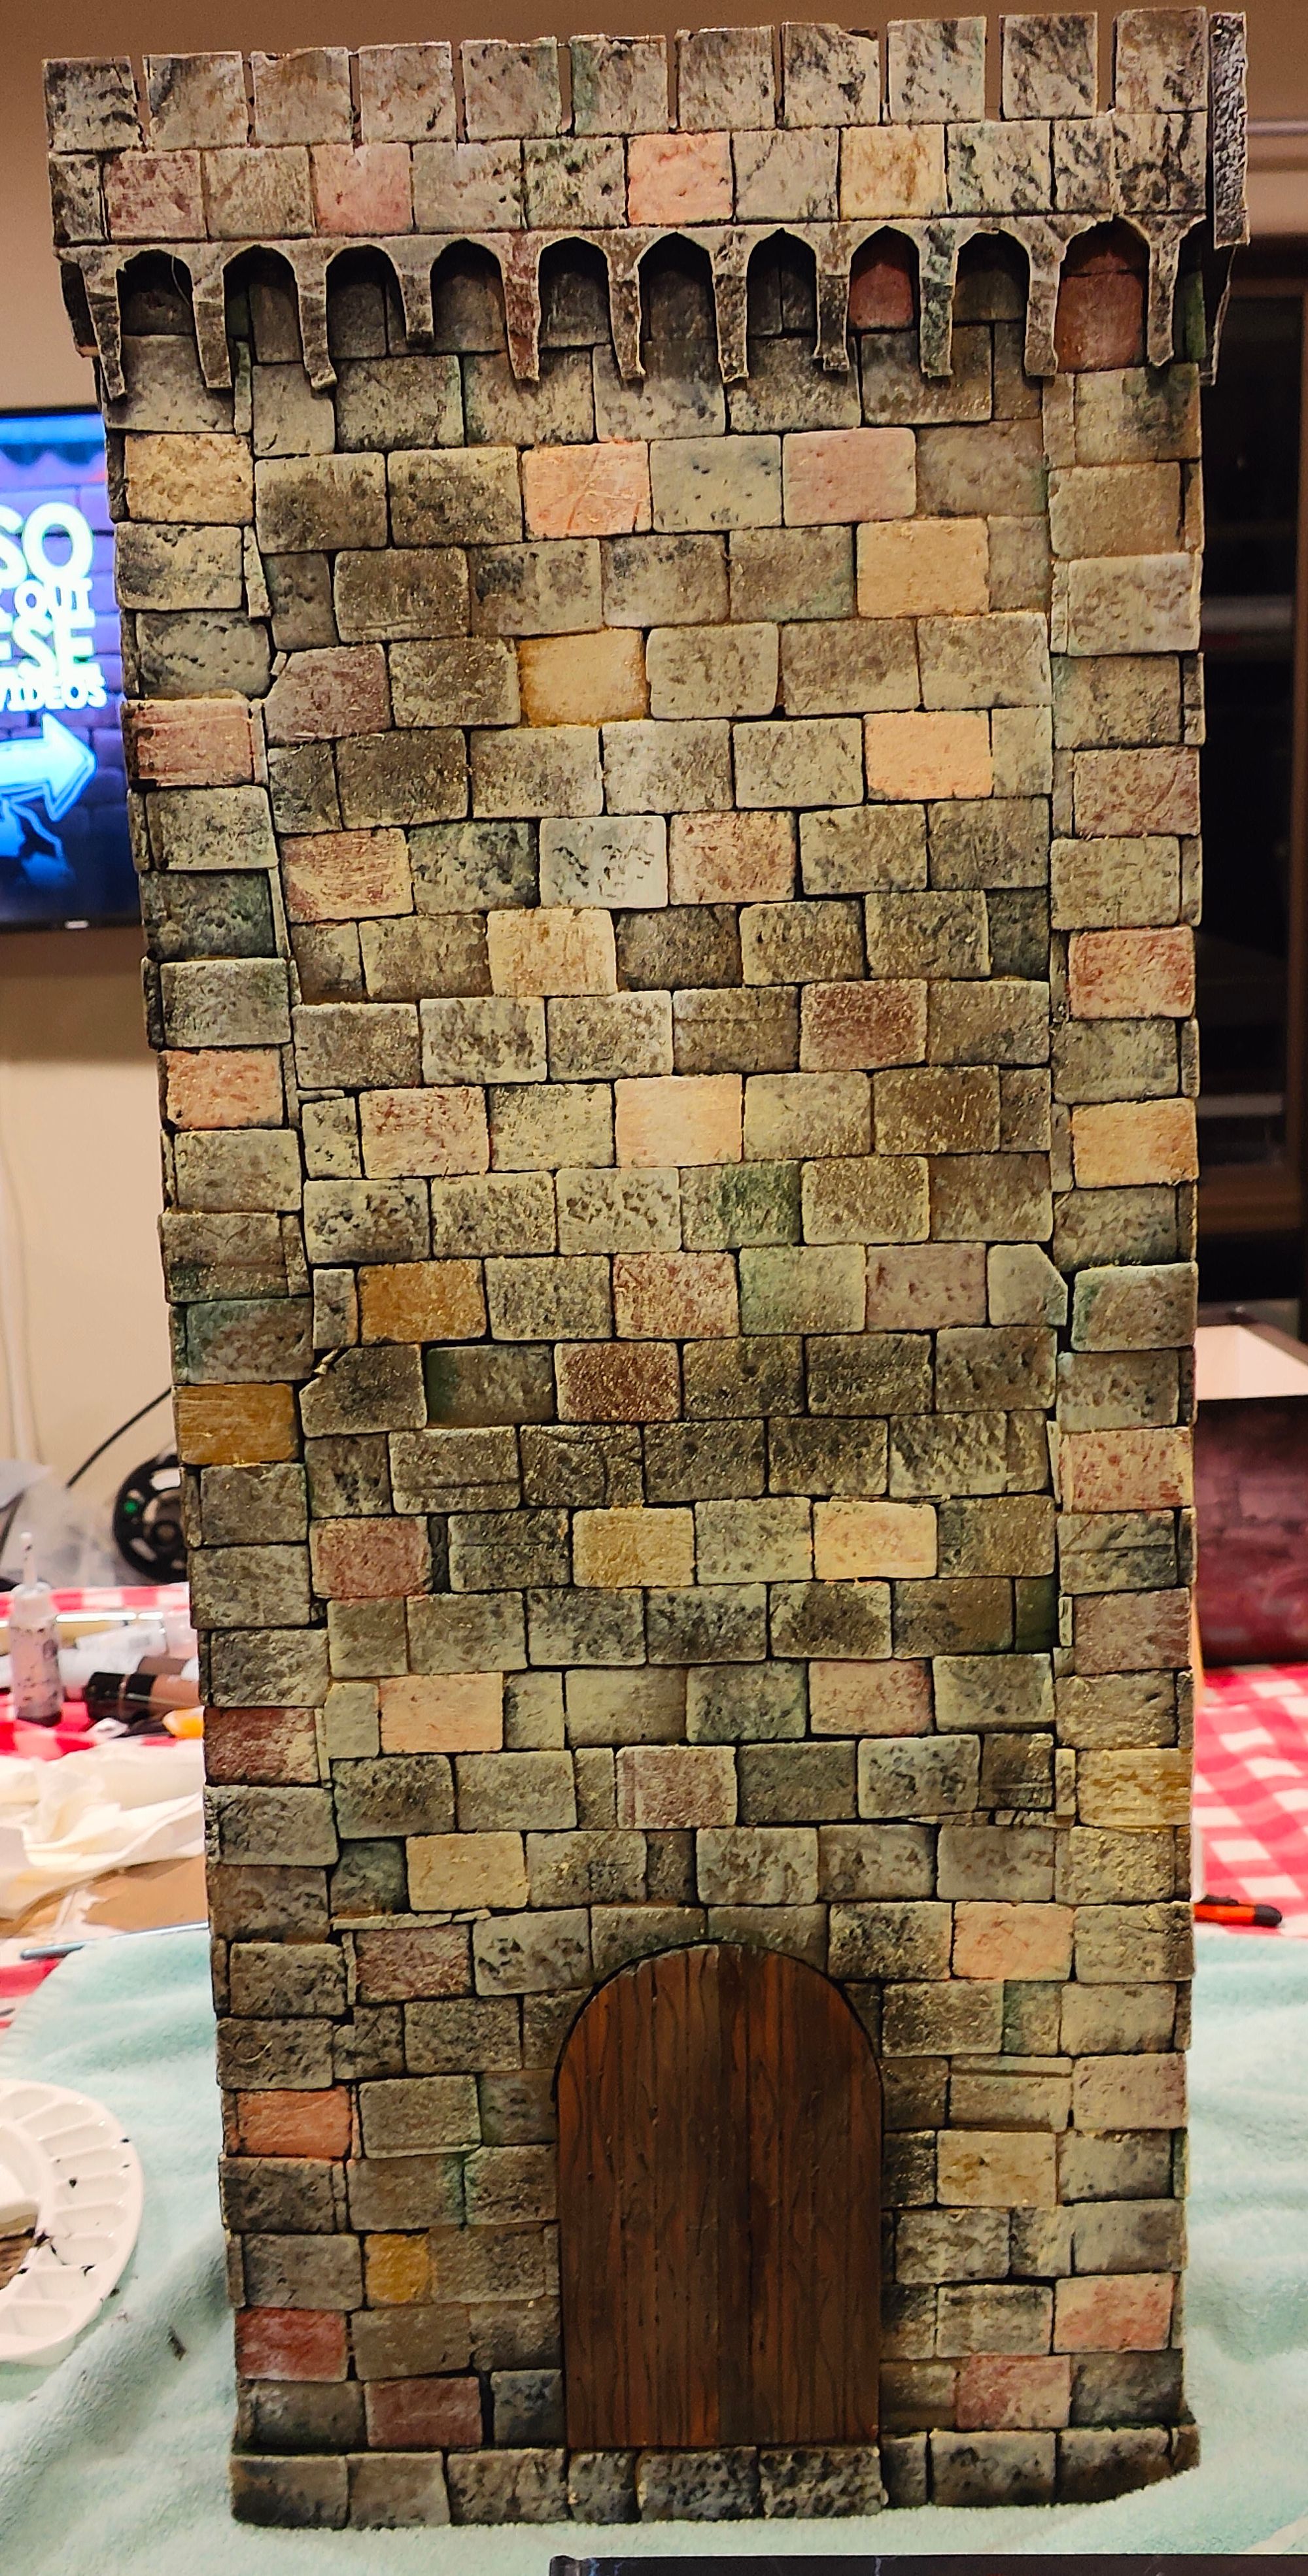
I used the Proxxon to cut ½ cm thick, 1inch by 1 ½ inch XPS rectangles for the individual bricks but not worrying if some were slightly thicker or thinner as this gave good variation to the depth on the walls. This was the stage where I thank my husband as he did the shaking for me - to texture the bricks they were put in tupperware with some rocks and shaken vigorously. I stuck the textured stonework on the corners first to cover up the gaps where the hinges were.
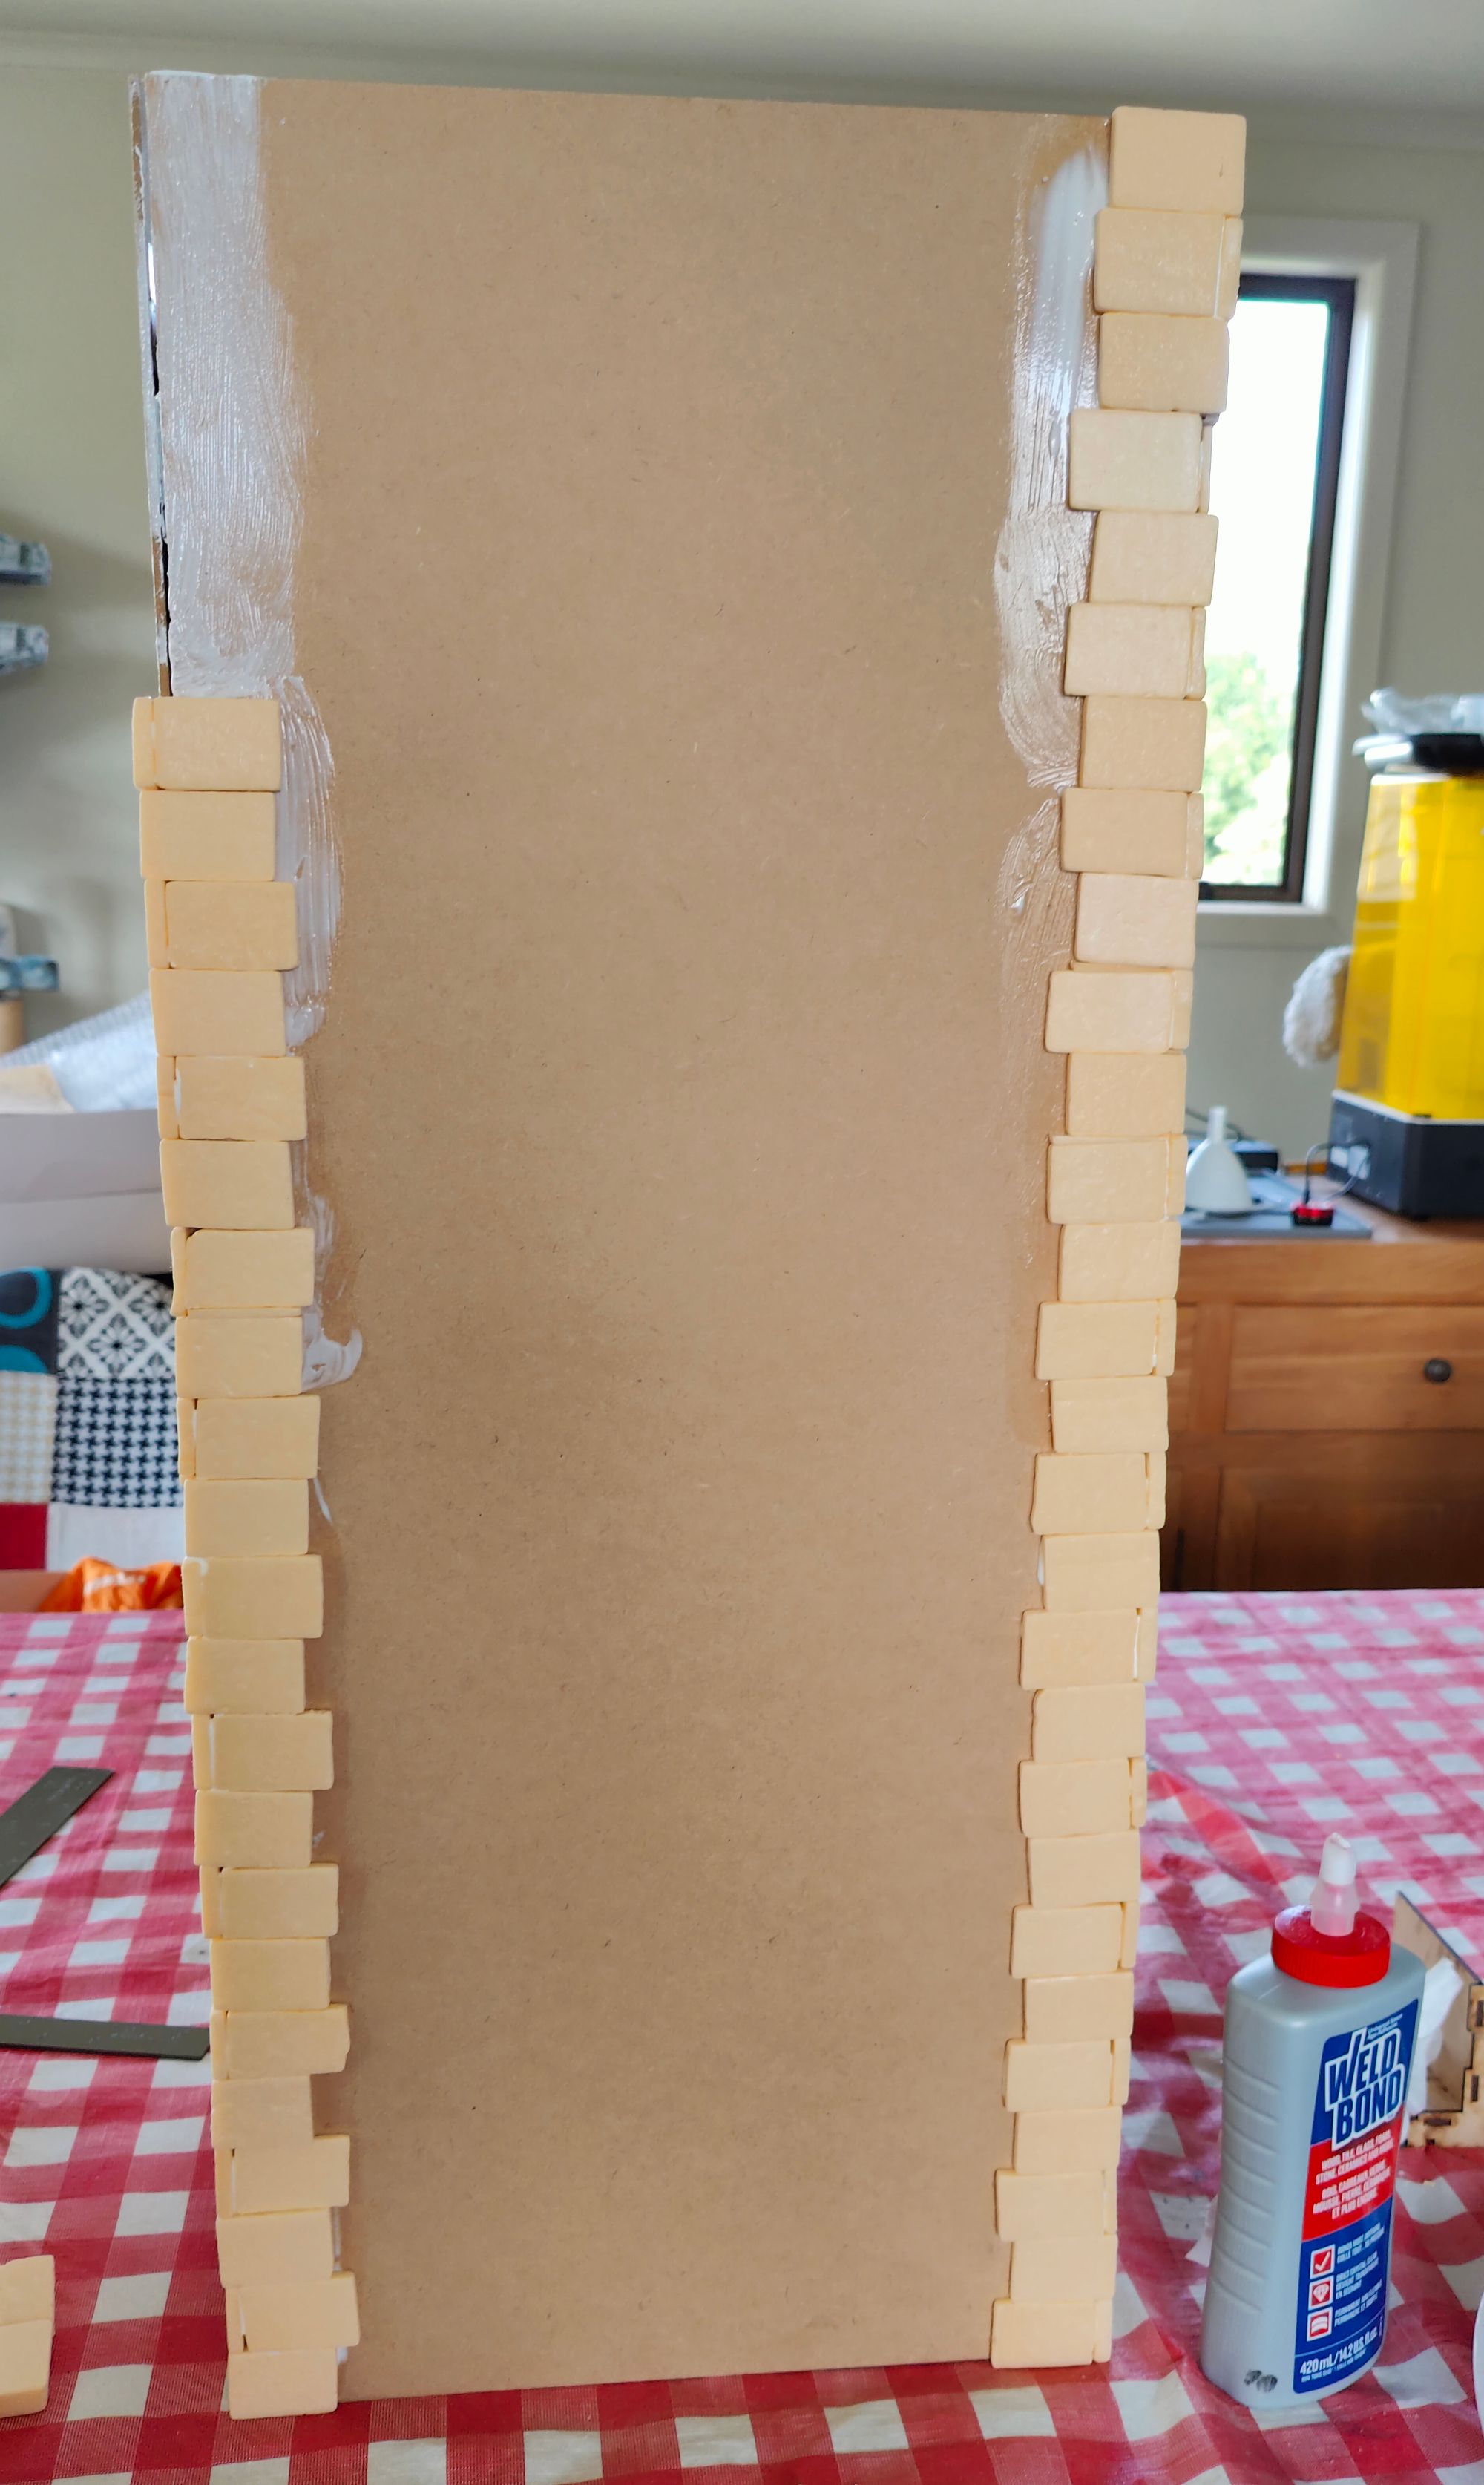
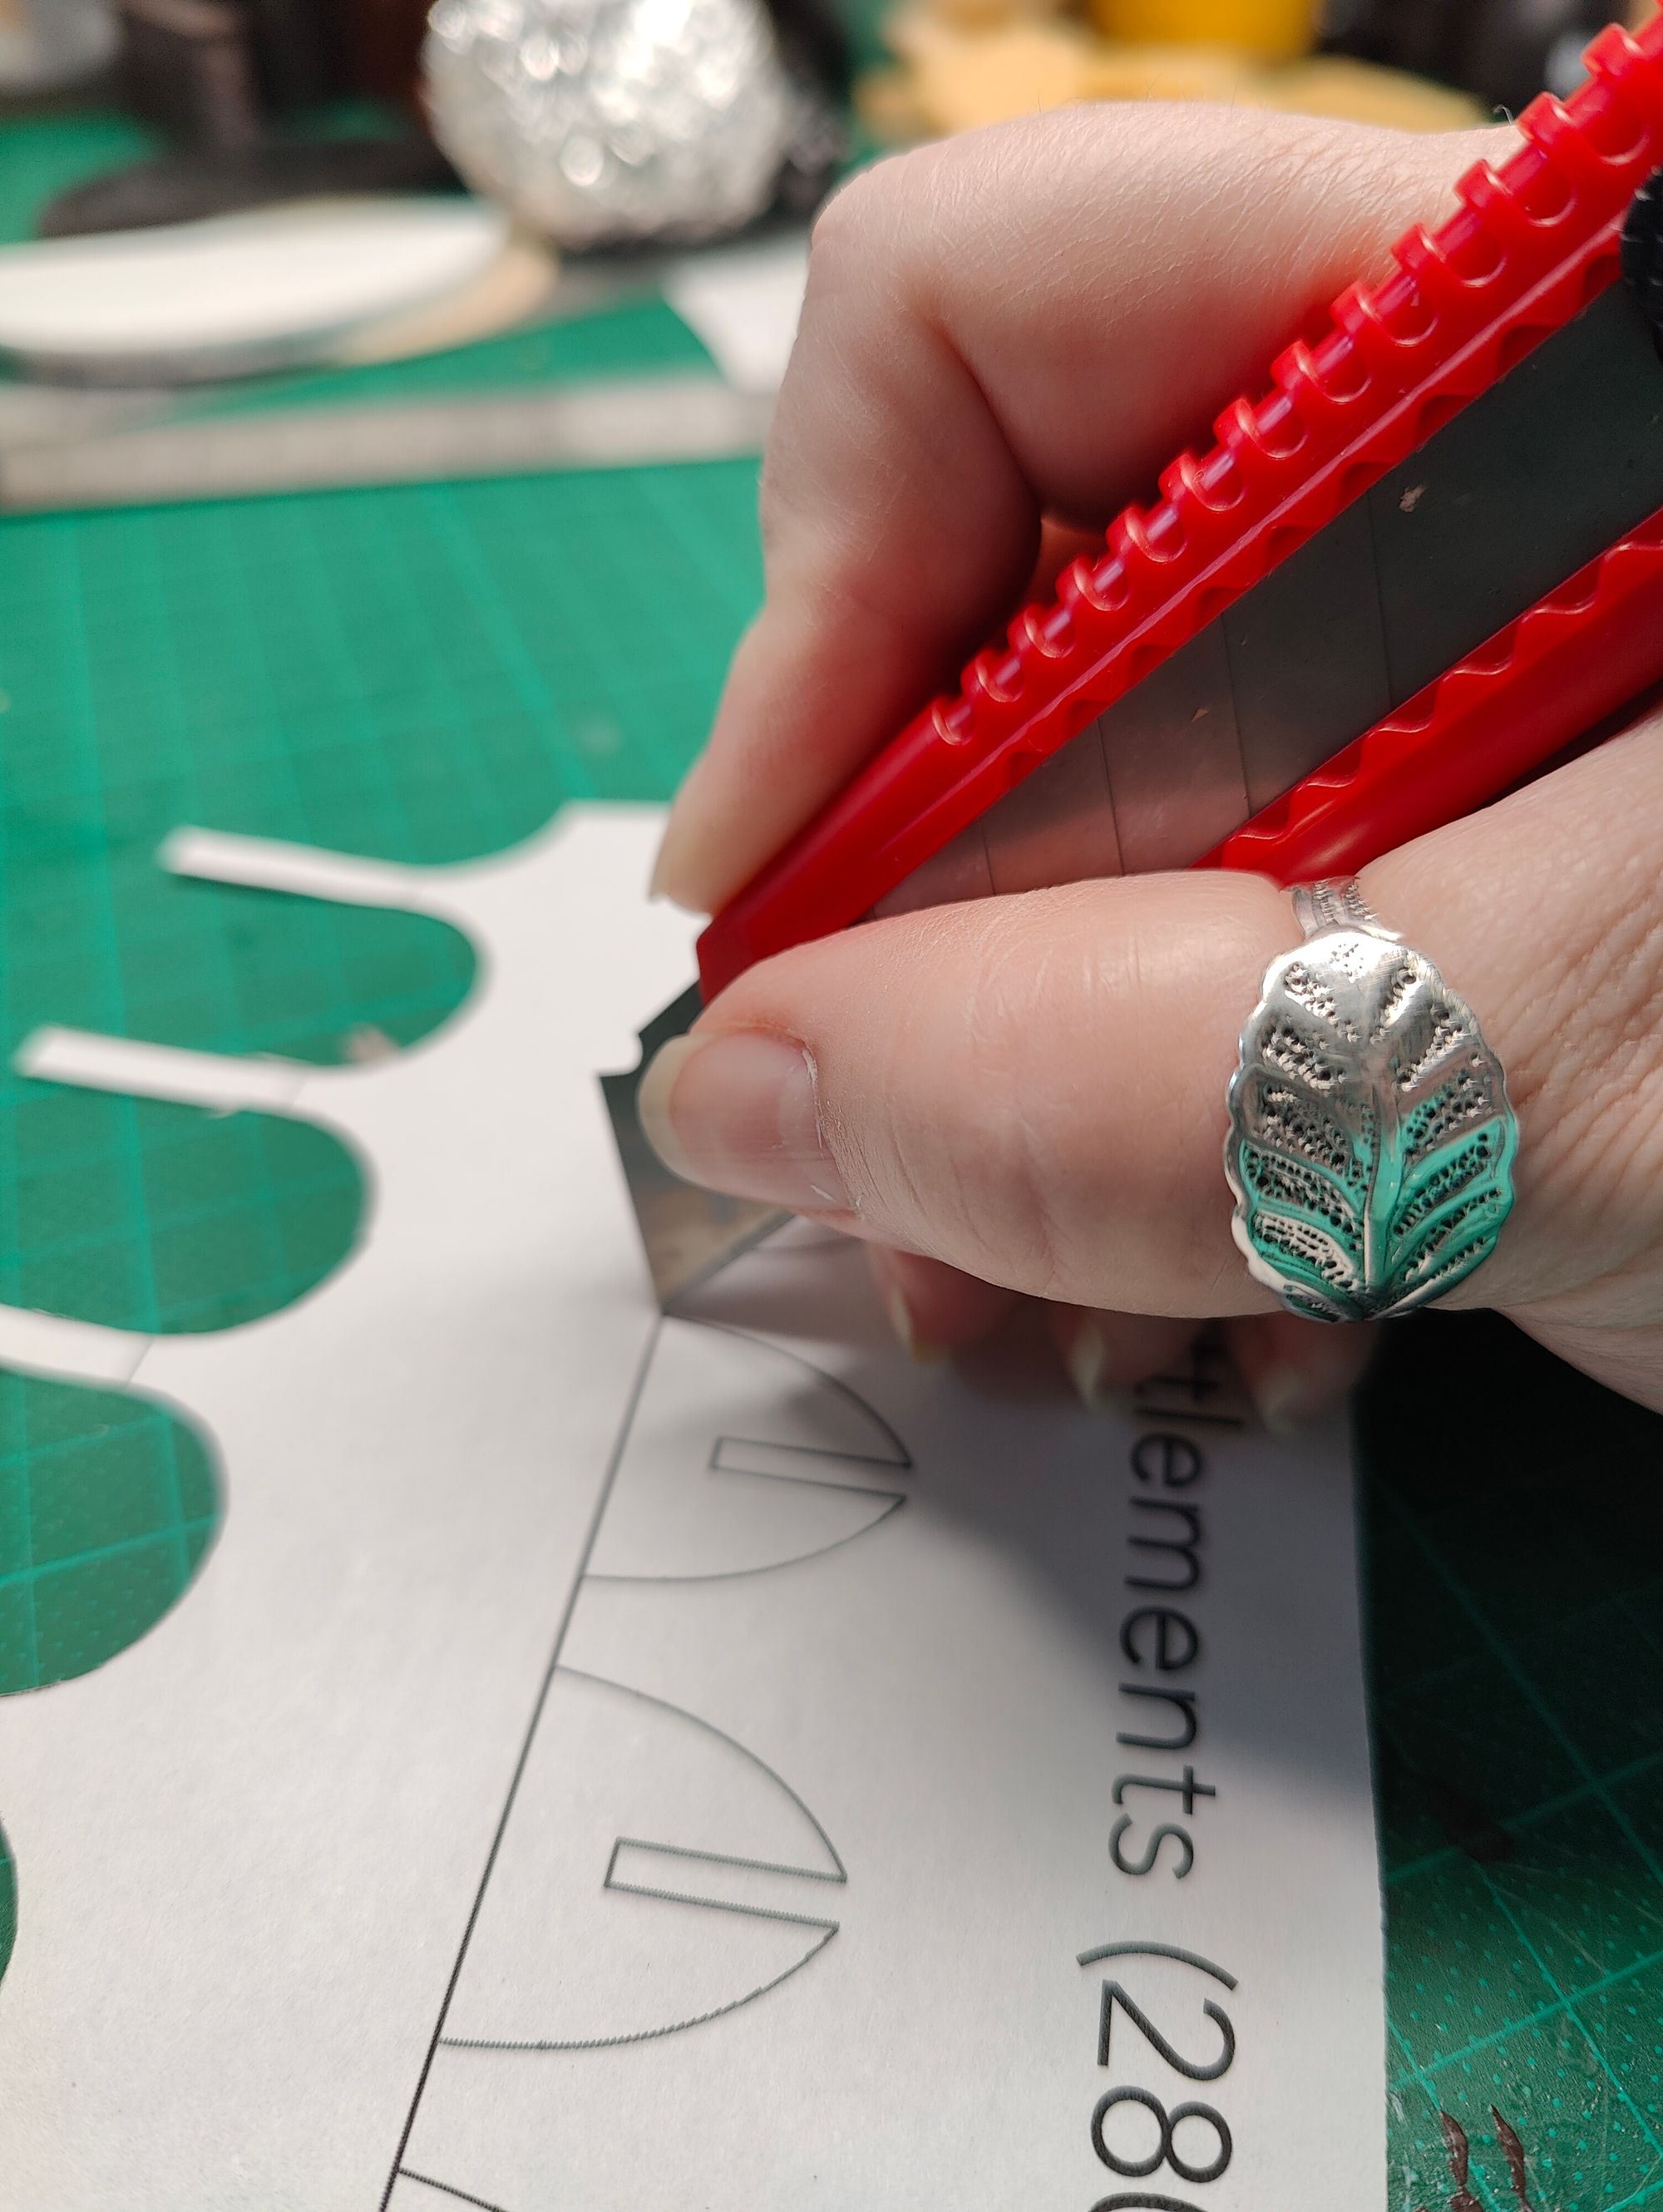
Once the edges were done I used more white glue to laboriously stick the rest of the stonework to the walls, using thicker bricks at the bottom and covering to the top. Again back to ZorpaZorp to get the battlements template which I cannibalised to have straight blocks at the top rather than the mitred version Lochie made. I cut out the guide, changed the shape to what I wanted, drew it onto cardboard, increased to the length needed and cut out two templates, one for top and bottom. Using dressmaking pins to line them up either side of a piece of XPS and tacking them in place with white tack. For speed the Proxxon came out again to cut out the battlements. I angled the corbels with a knife and overall the effect was what I had hoped. Again I glued with white glue and left to dry, using some foam safe spray paint I base coated in black.
It was at this point in the process that I decided to add a door and just used a protractor to draw a curve on top of some straight lines on a 0.5cm thick piece of XPS, I did it by sight with no measurements. I cut down the centre as I was planning to have the door slightly ajar but changed my mind when I saw it in place, I drew on wood lines for planks and freehand lines to show the grain of the wood, finally gluing two jewellery links for the door handles.
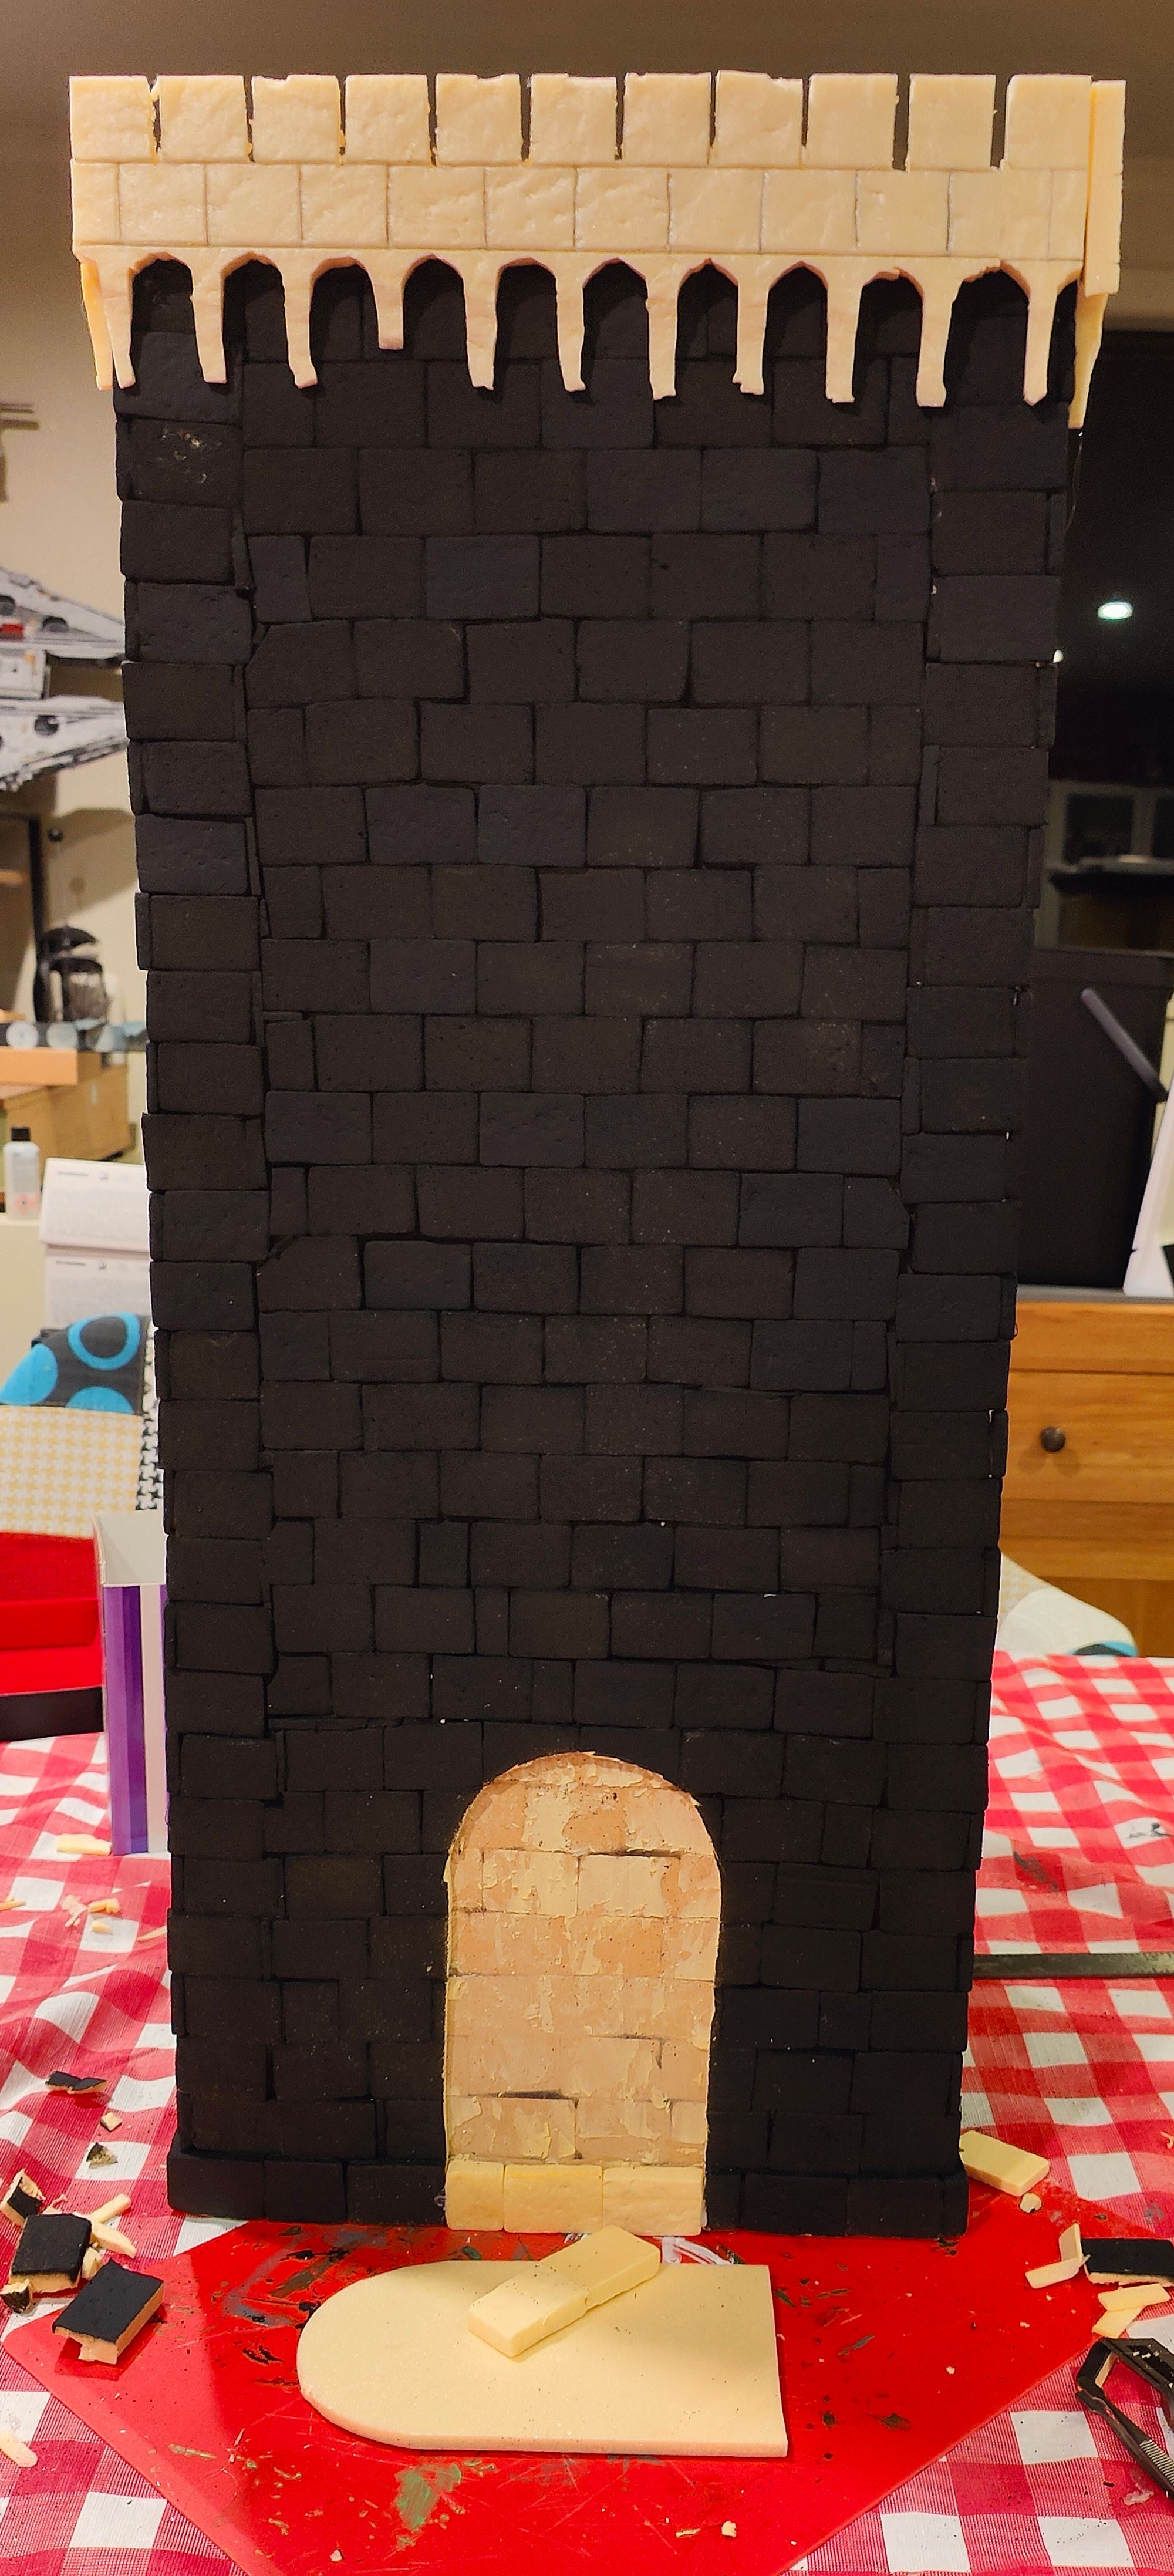
Because I had decided to do this rather late I then had the issue of drawing around the door on the wall and hacking out the bricks from the shape so that I could recess the door. I used two of the thicker bricks to form a step in front of the door. Initially I had thought I wasn't going to bother, same as the arrow slits but as time went on I really felt that a tower would at least have an entrance. Also if there was no door there was no option for the happy couple to remove the door and use the tower as a cat playpen after the big day 😁.
Once it was all basecoated I continued on with the tan overbrush, I wanted a slightly darker colour here so I added some burnt umber to the tan until I got the shade I wanted. The next layer was individual brick painting to add some variation. I didn’t stick to the colour scheme here either, instead I chose shades of red rather than orange as Lochie does. This was the stage where I added green moss to some of the bricks.
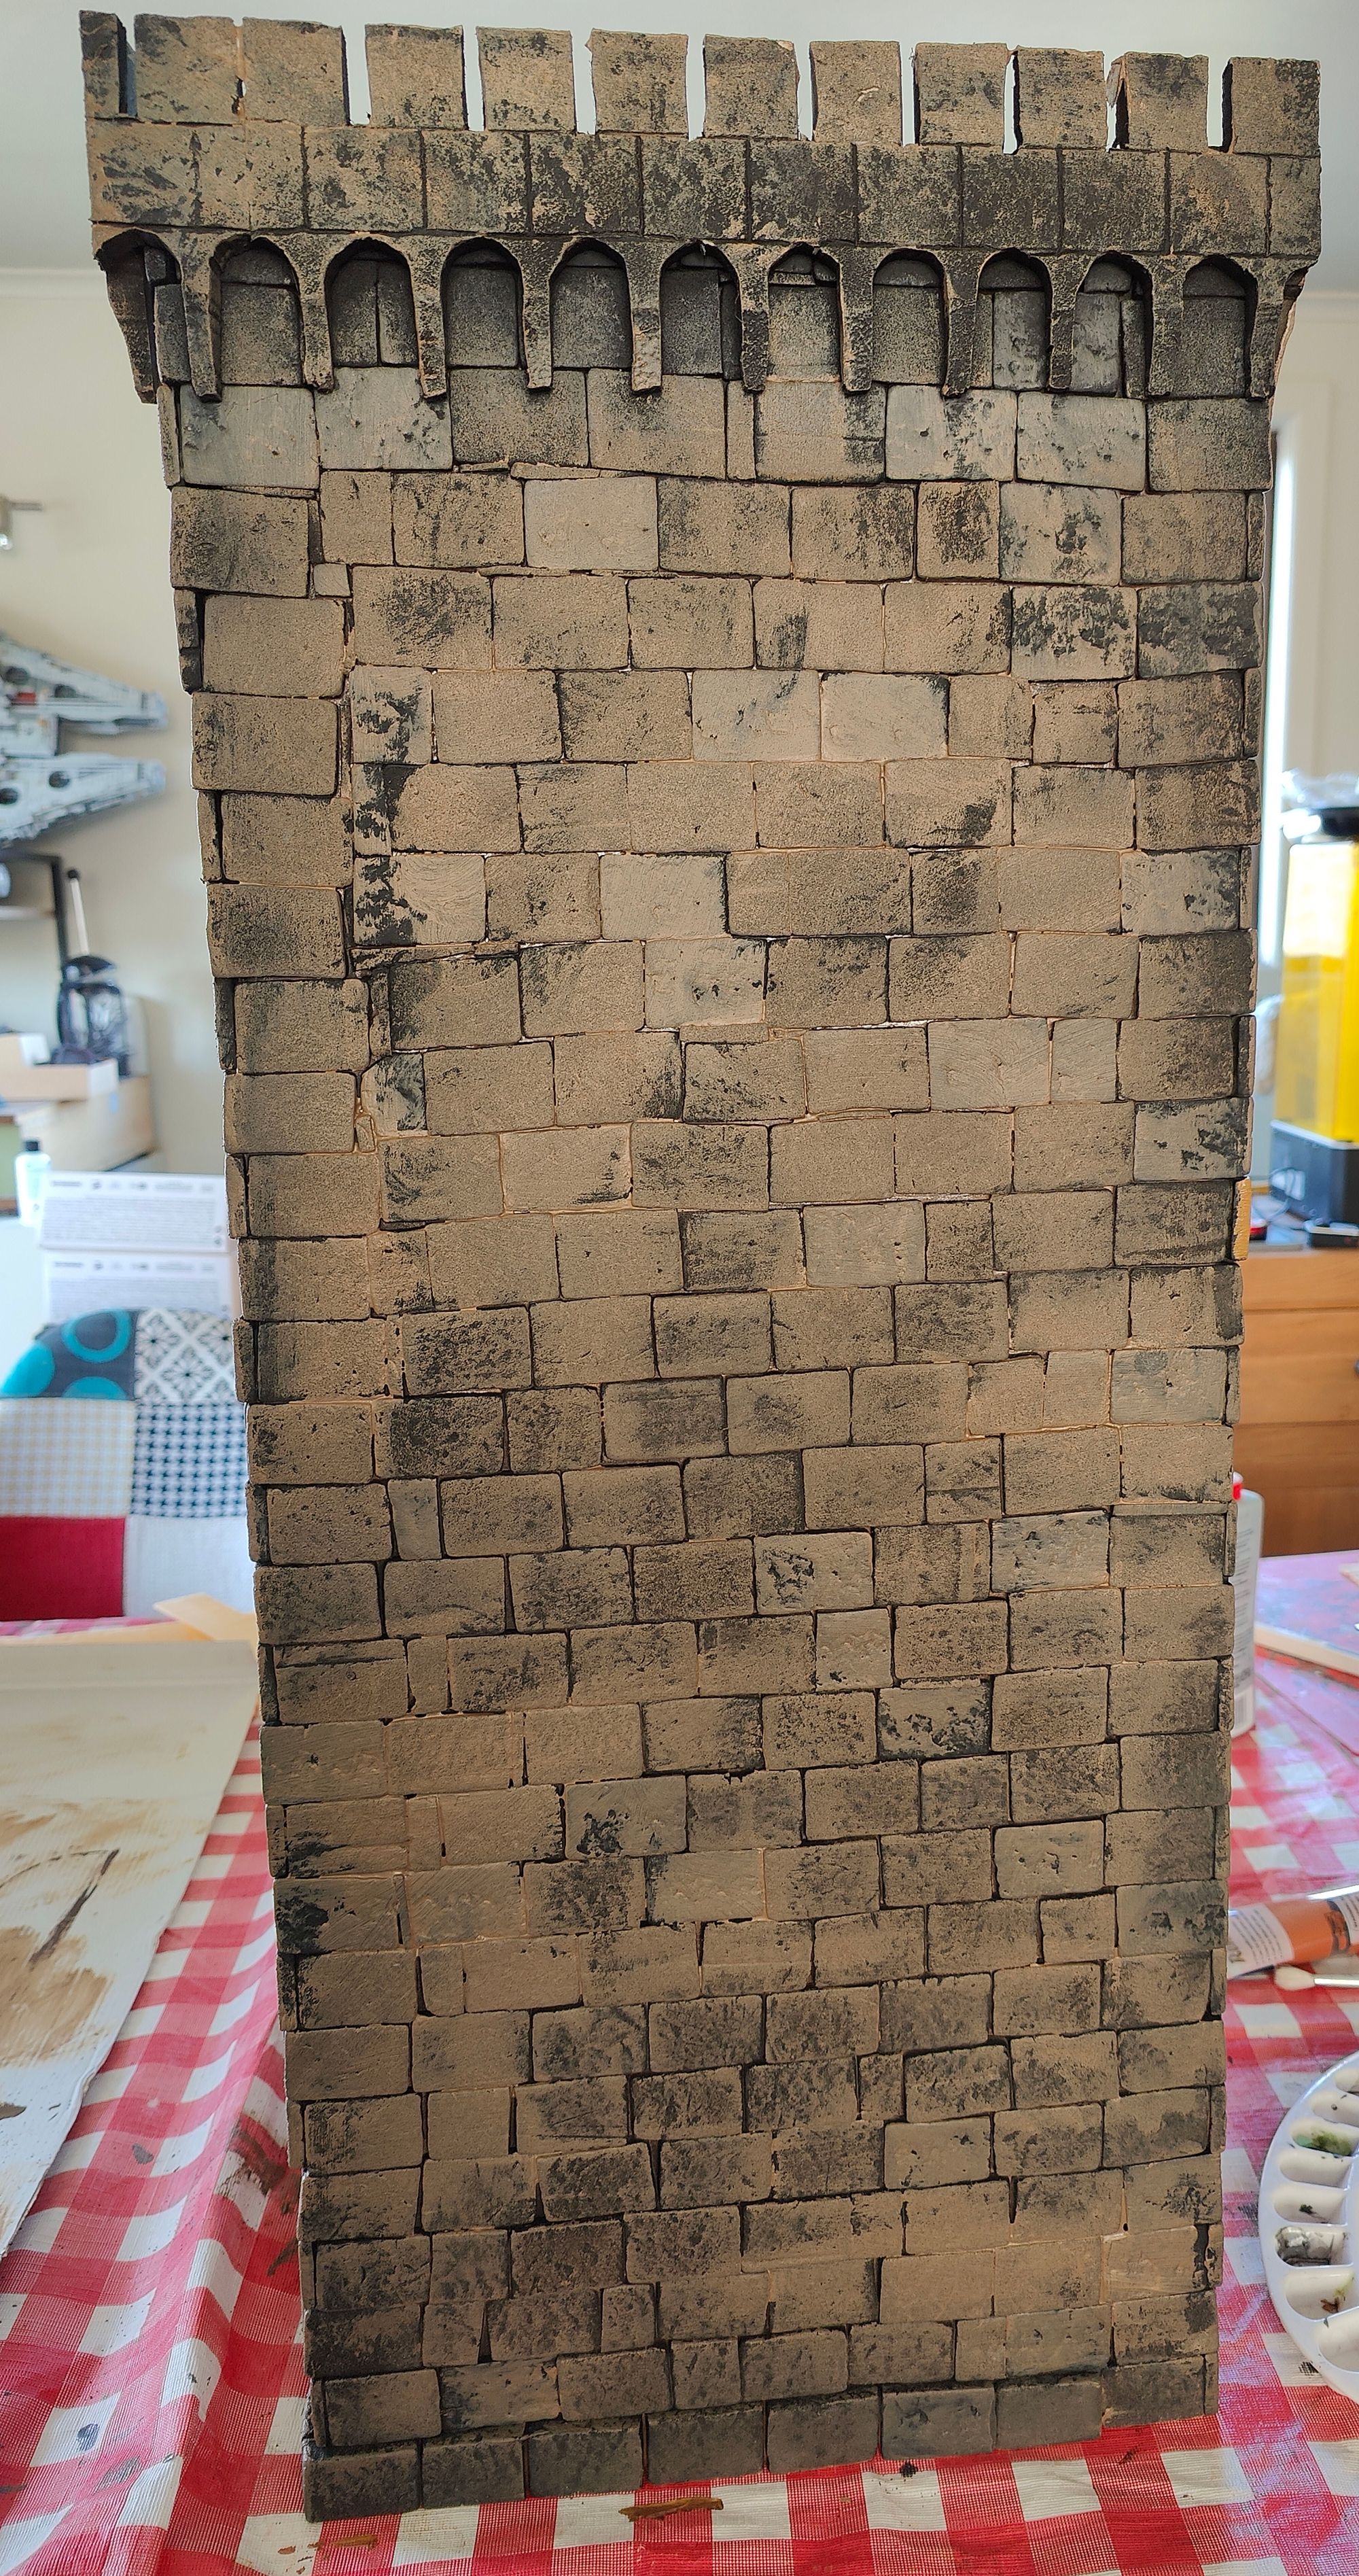
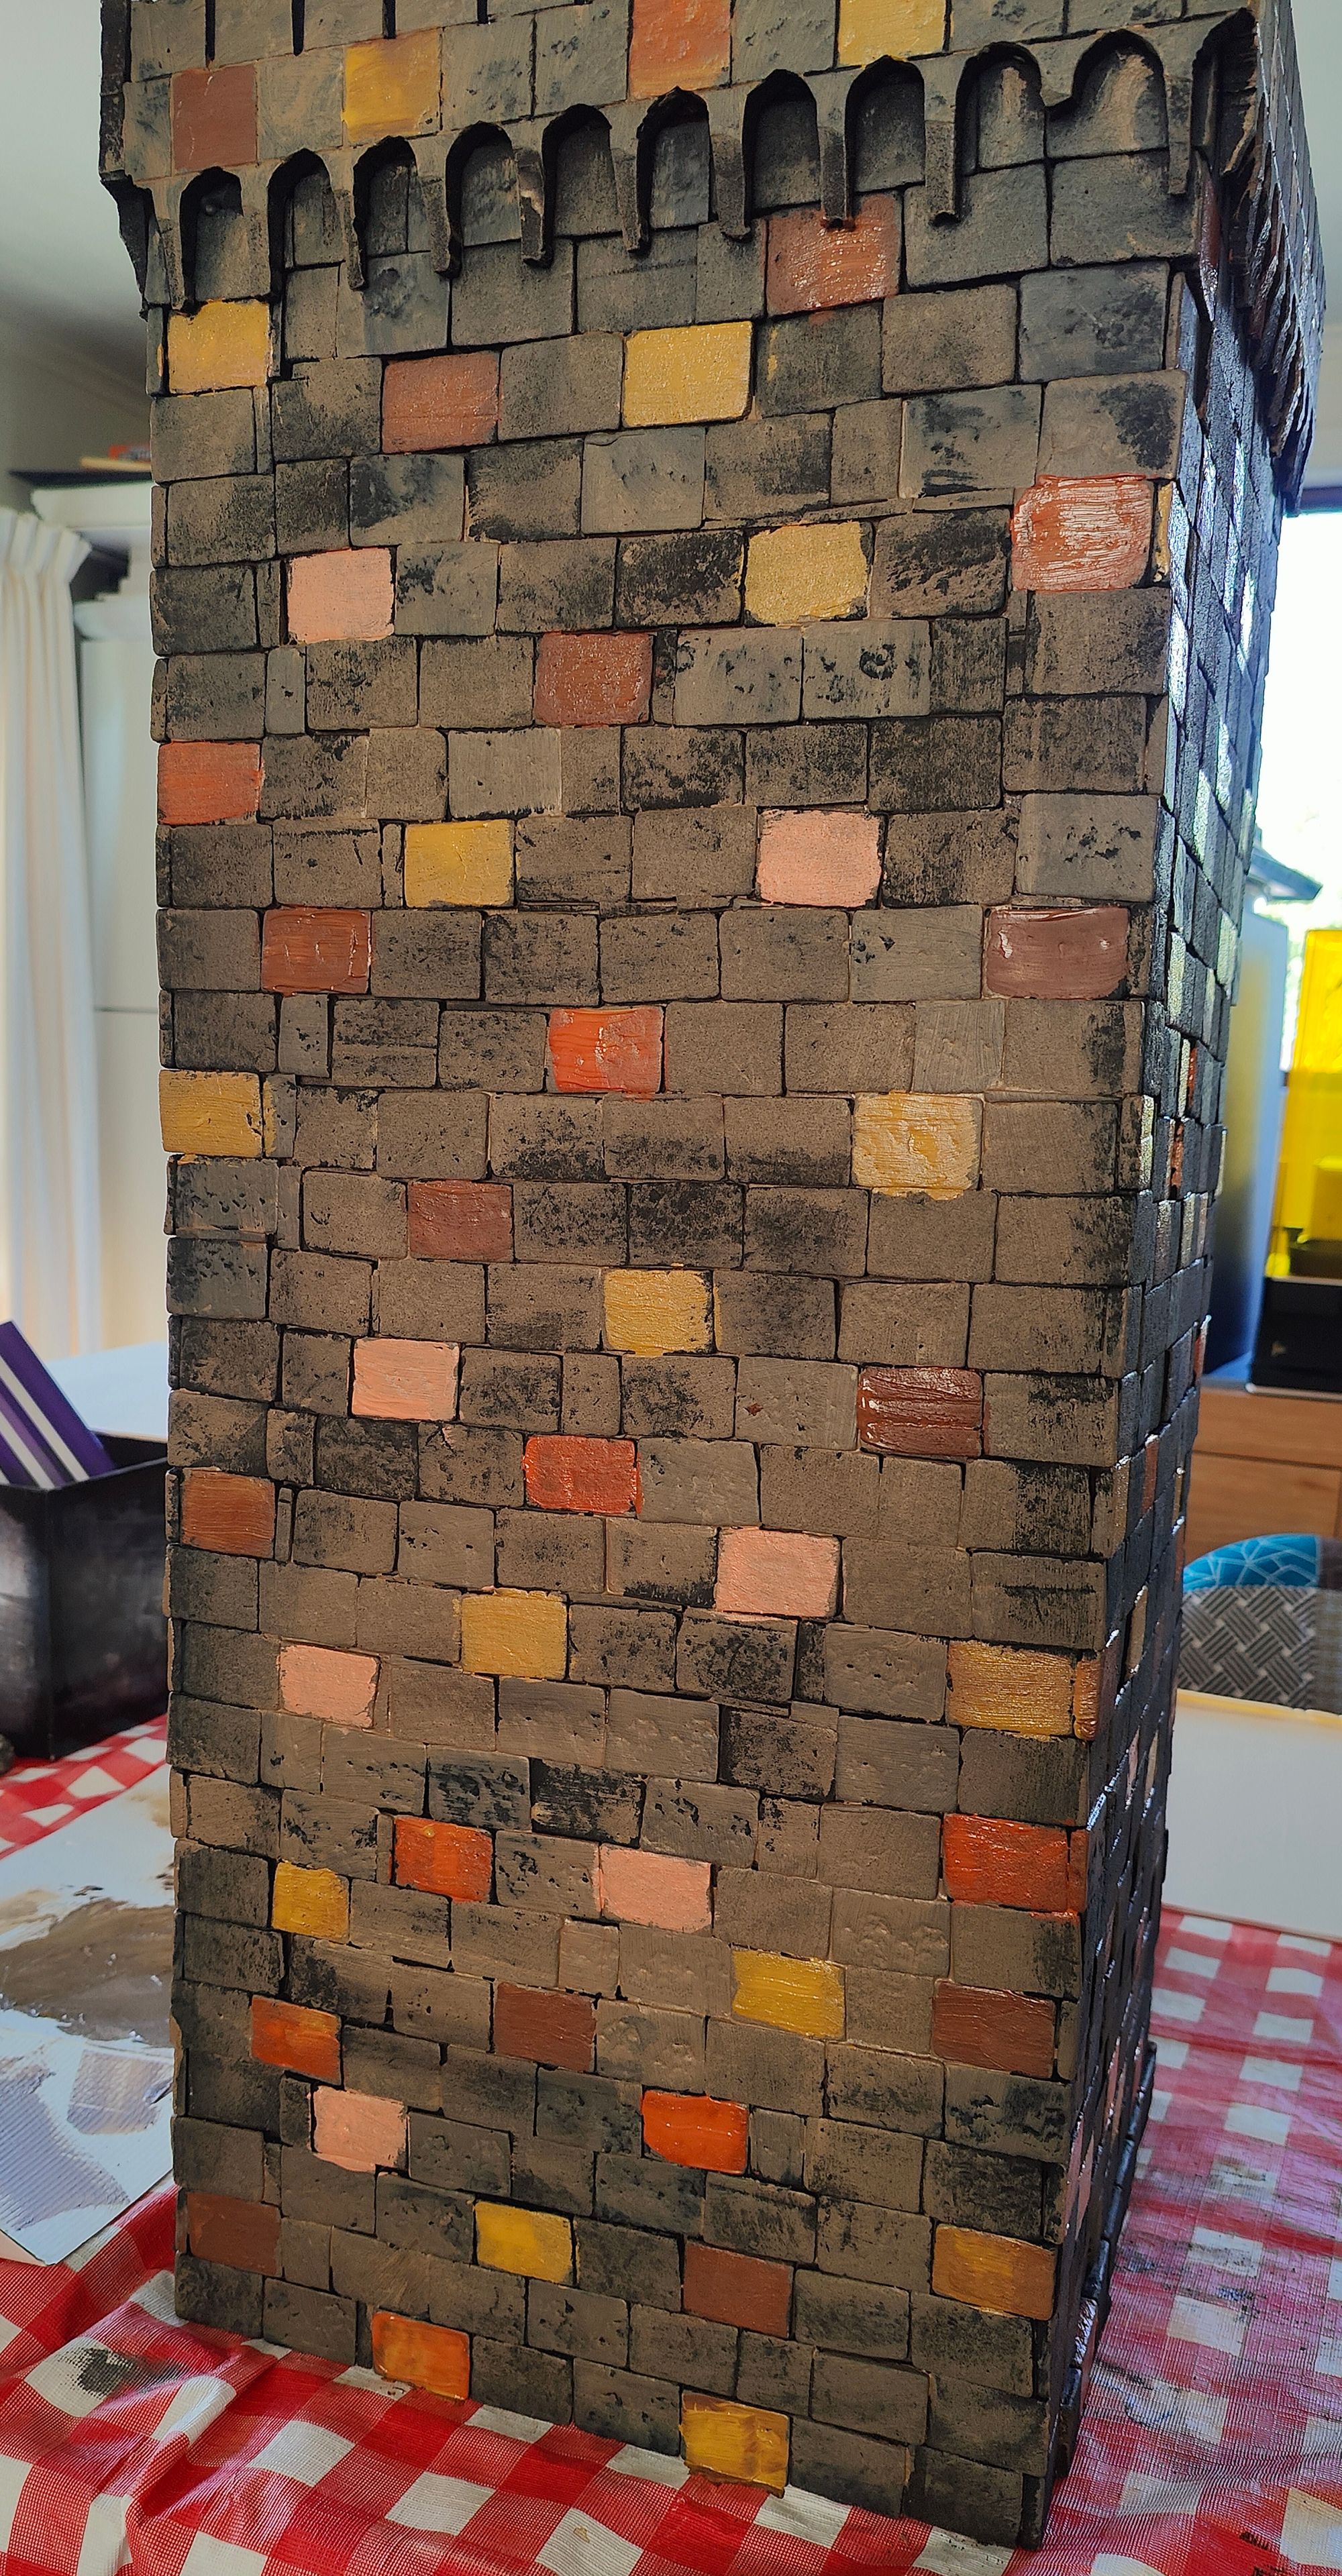
The individual bricks were blended with a shade of antique white and a touch of tan, then finally an acrylic blackwash over everything to tie it together. I chose an acrylic rather than an oil wash because by now it was 10pm the night before the wedding and I had to be absolutely sure it would be dry.
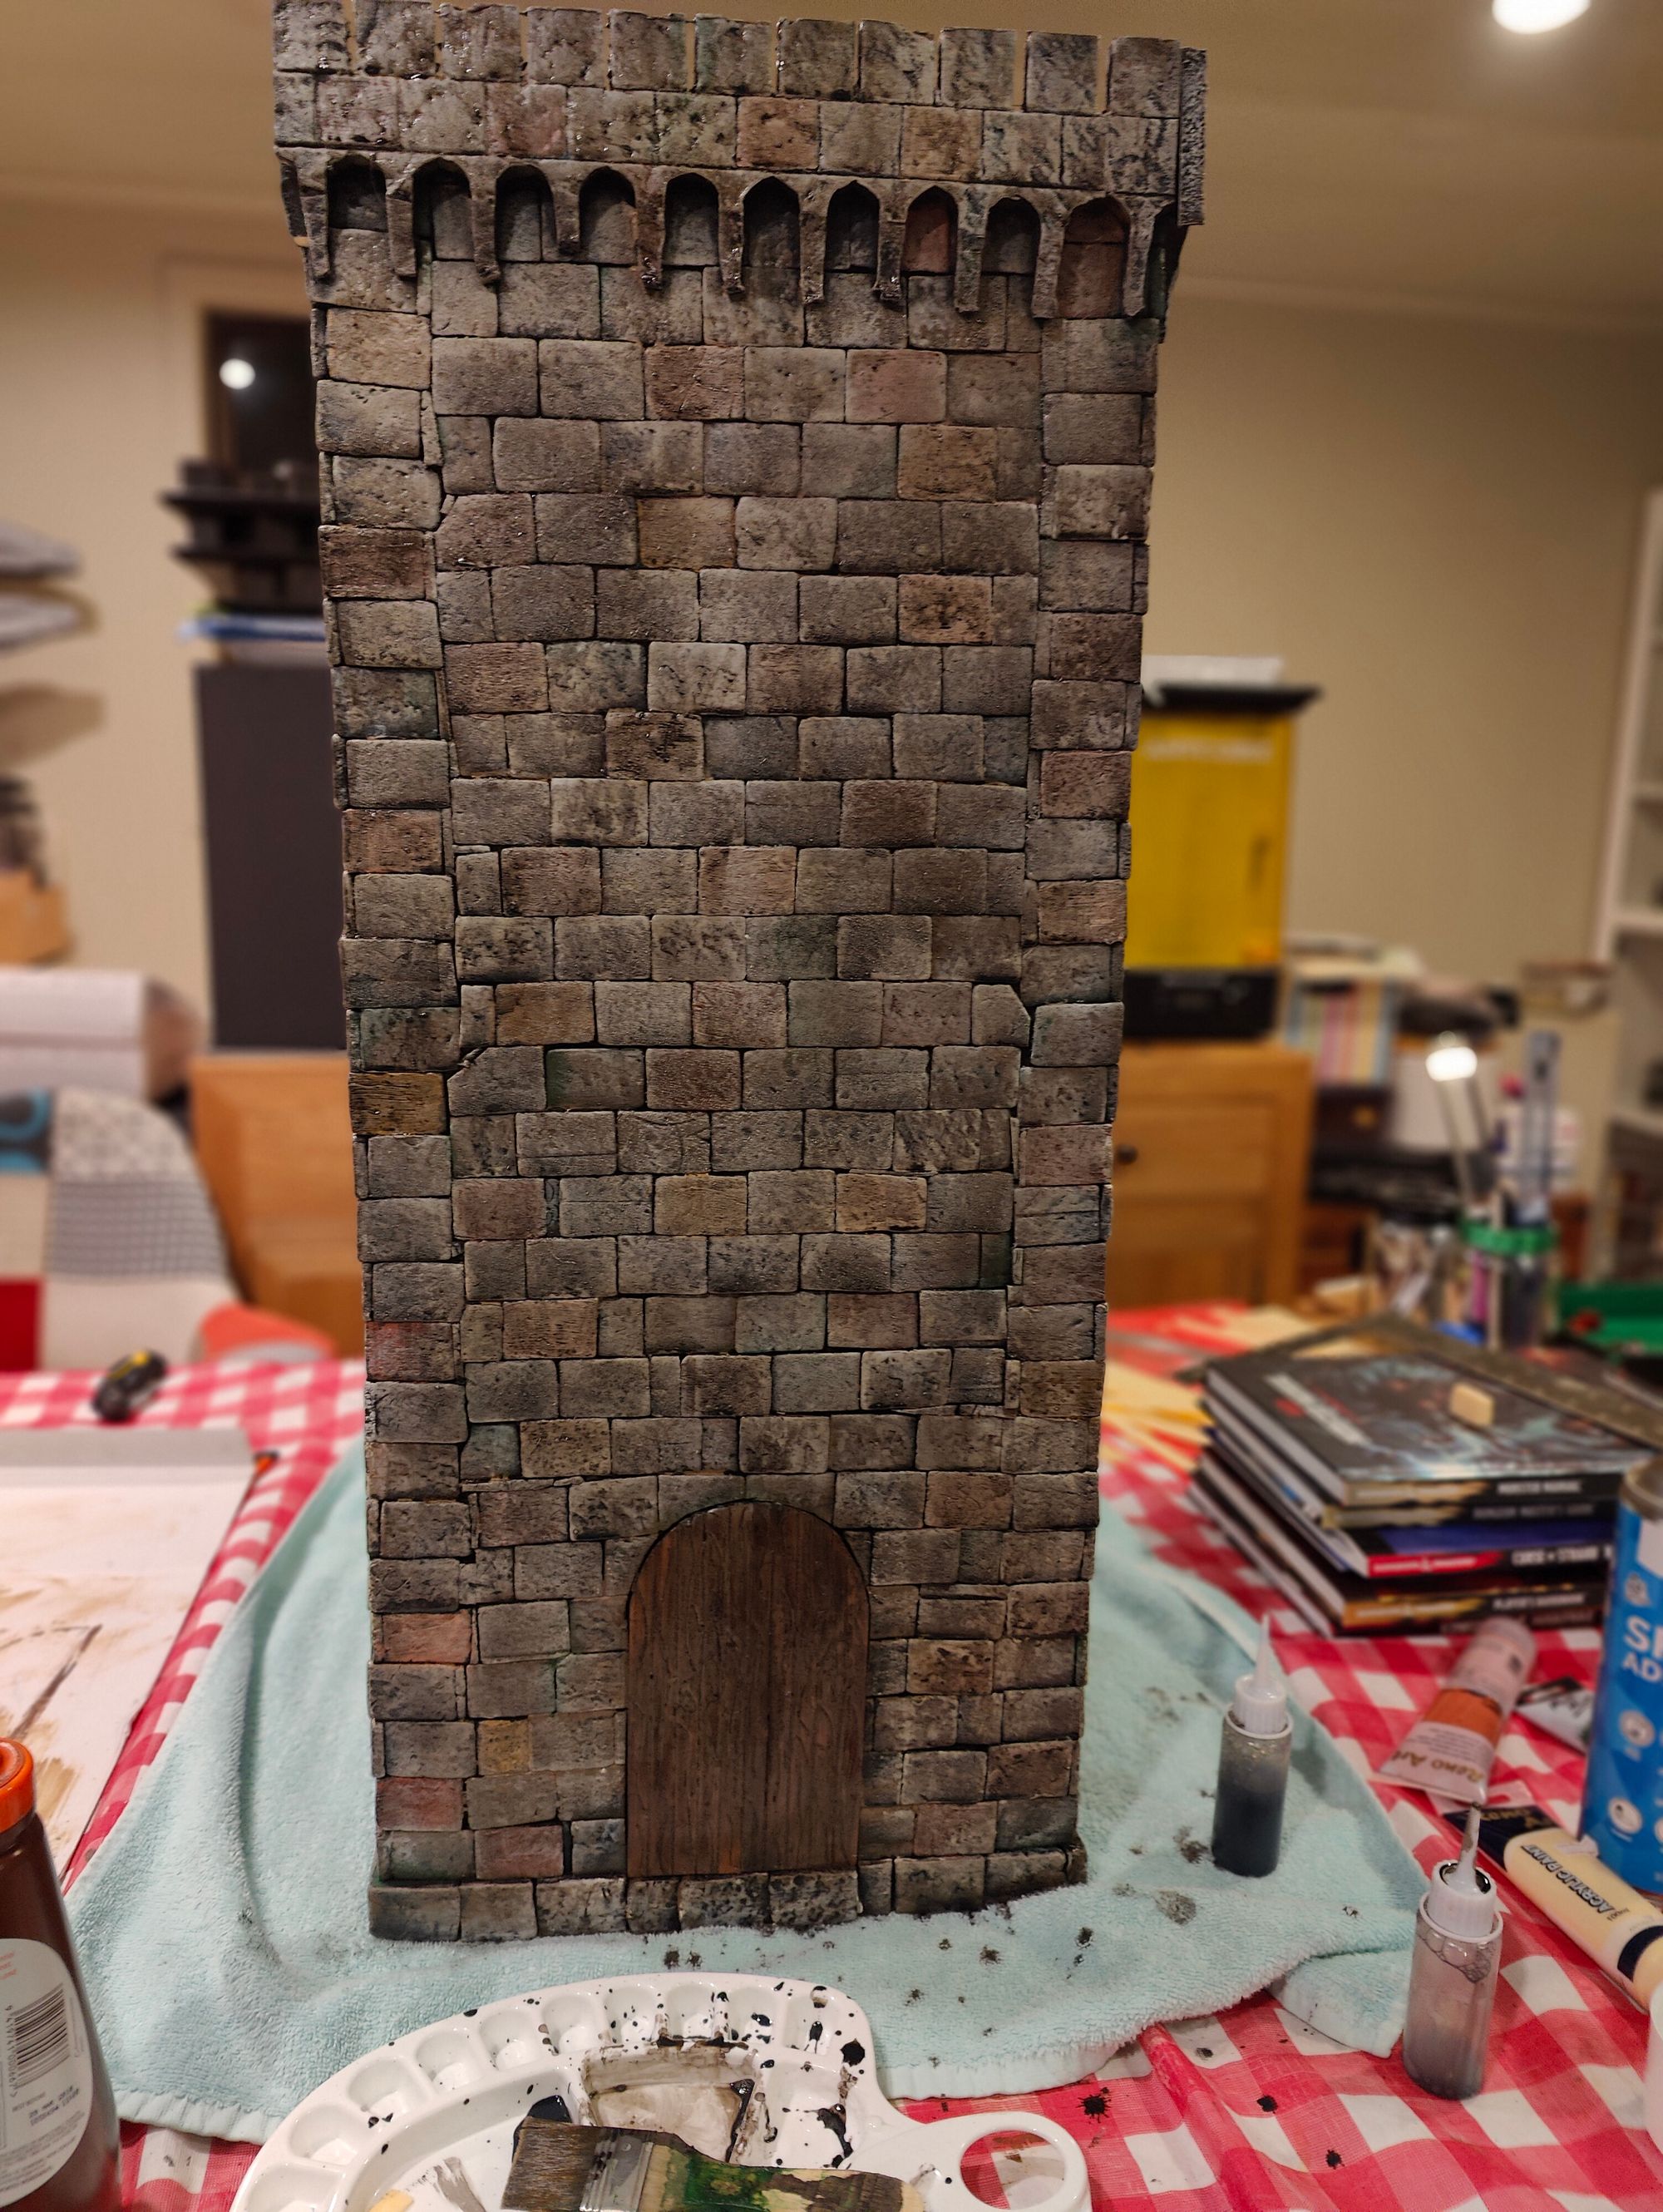
The roof was constructed of thin lines of shingles cut from XPS and stuck to an A frame of foam board with a slit cut into it for the envelopes to be pushed through. It was cut by eye to the size of the hole at the top of the tower so that it wedged in and could be easily removed, this way it could be pushed below the line of the crenellations and did not need supports inside the tower to hold it. I painted the tiles burnt umber and dry brushed with copper, finishing with a black acrylic wash.
I ran out of time for basing and had to ask my husband to do it as I had to be at the bride’s house quite early the next morning whereas he had the day to himself. This is why it just has a square of MDF at the base with a few tufts of grass.
What would I have done differently? I would have started earlier - easy to say. I would have also cut some arrow slits which in turn would have required the inside walls to be base coated in black. I don’t think on something this big the type of wash made any difference so I would keep the acrylic wash. I definitely would have cut the door and arrow slits at the beginning and likely would have put some keystones to define the doorway. At the moss stage where I added dark green Vallejo to the corners of some of the bricks, I would be much heavier handed when I next use this.
The main point was that the Bride and Groom liked it and it even got a special mention in the speeches😊.